Programs and Tutorials
HTML
MineCraft
Visual Basic
'C' Programing
MS DOS
Commodore 64
Raspberry Pi
3D Printing
Misc
Installing SLL Certificate for Apache in Windows 10
This is a basic tutorial on how to install a SLL Certificate for Apache web server software in Windows 10 a with single domain.
Please read tutorial start to finish before proceeding, click on images to enlarge.
Step 1) Obtain SSL Certificates & Key -
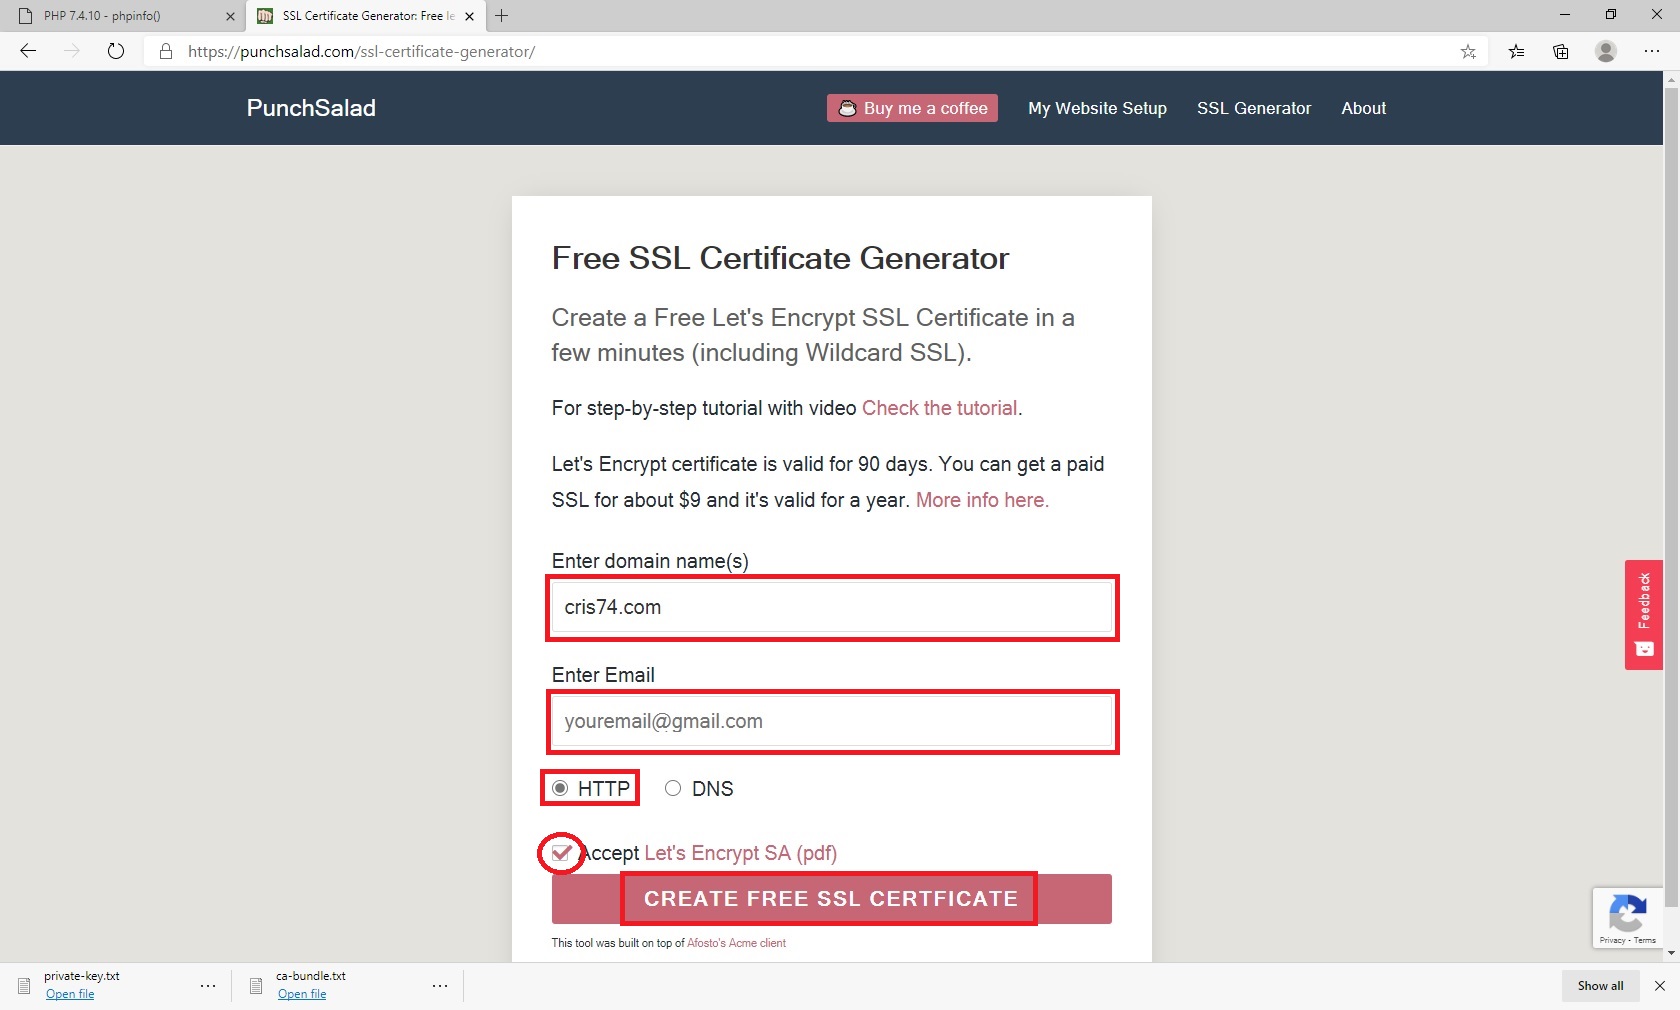
A) Navigate to the website - "https://punchsalad.com/ssl-certificate-generator/".
B) In the "Enter domain name(s) field put your domains in, don't include the "http://" when typing the domains.
C) Enter the email you want the SSL certificates linked to in the "Enter Email" field.
D) Have "HTTP" selected and check "Accept Let's Encrypt SA(pdf) checkbox.
E) Click "CREATE FREE SSL CERTIFICATE" to proceed to the next step.
Step 2) Verify Domain Ownership -
A) Click "Download File #1" to download the verification file,basically a file that is a mass of numbers and letters.
B) Now you need to create some folders in your "C:\Apache24\htdocs" folder. First create a folder named ".well-known", then open that folder and create another folder called "acme-challenge".
C) Copy the verification file into this directroy.
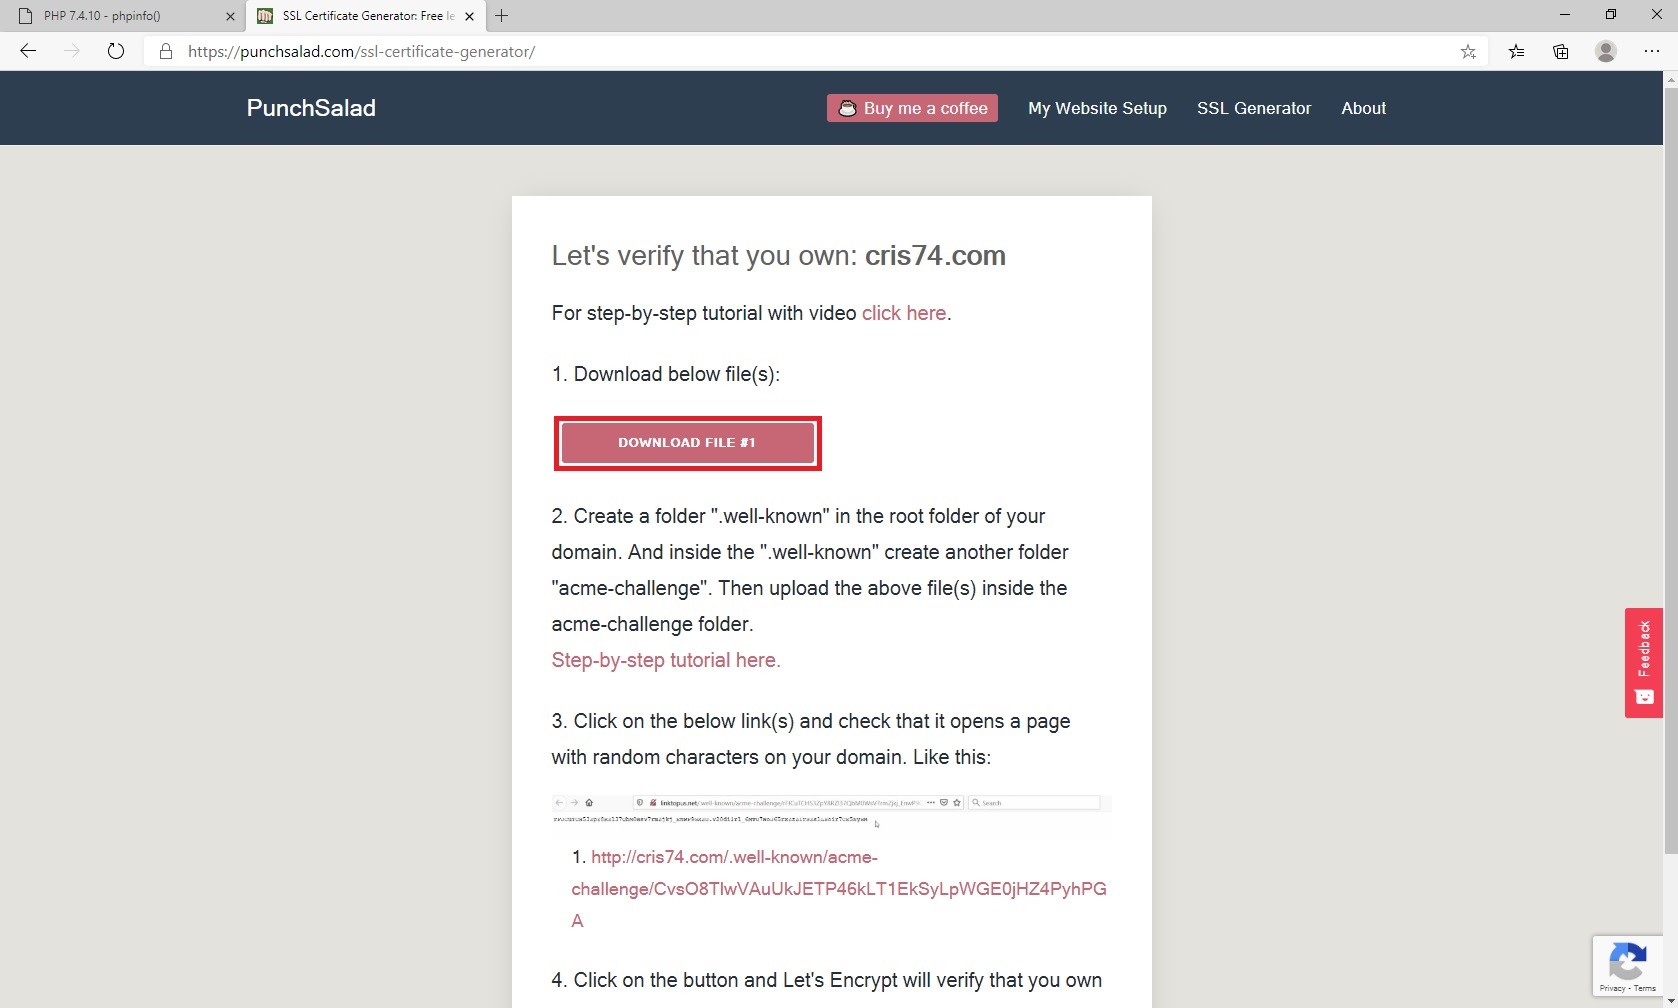

To ensure the file is in the right location there is a link near the bottom of the web page, it will be something like "http://YourDomain.com/.well-known/acme-challange/bunch of numbers and letters".
Click this link and if a web page shows up showing another bunch of random numbers and letters you are good to go. If file not found comes up the verification file is in the wrong location or the domain you entered isn't correct.
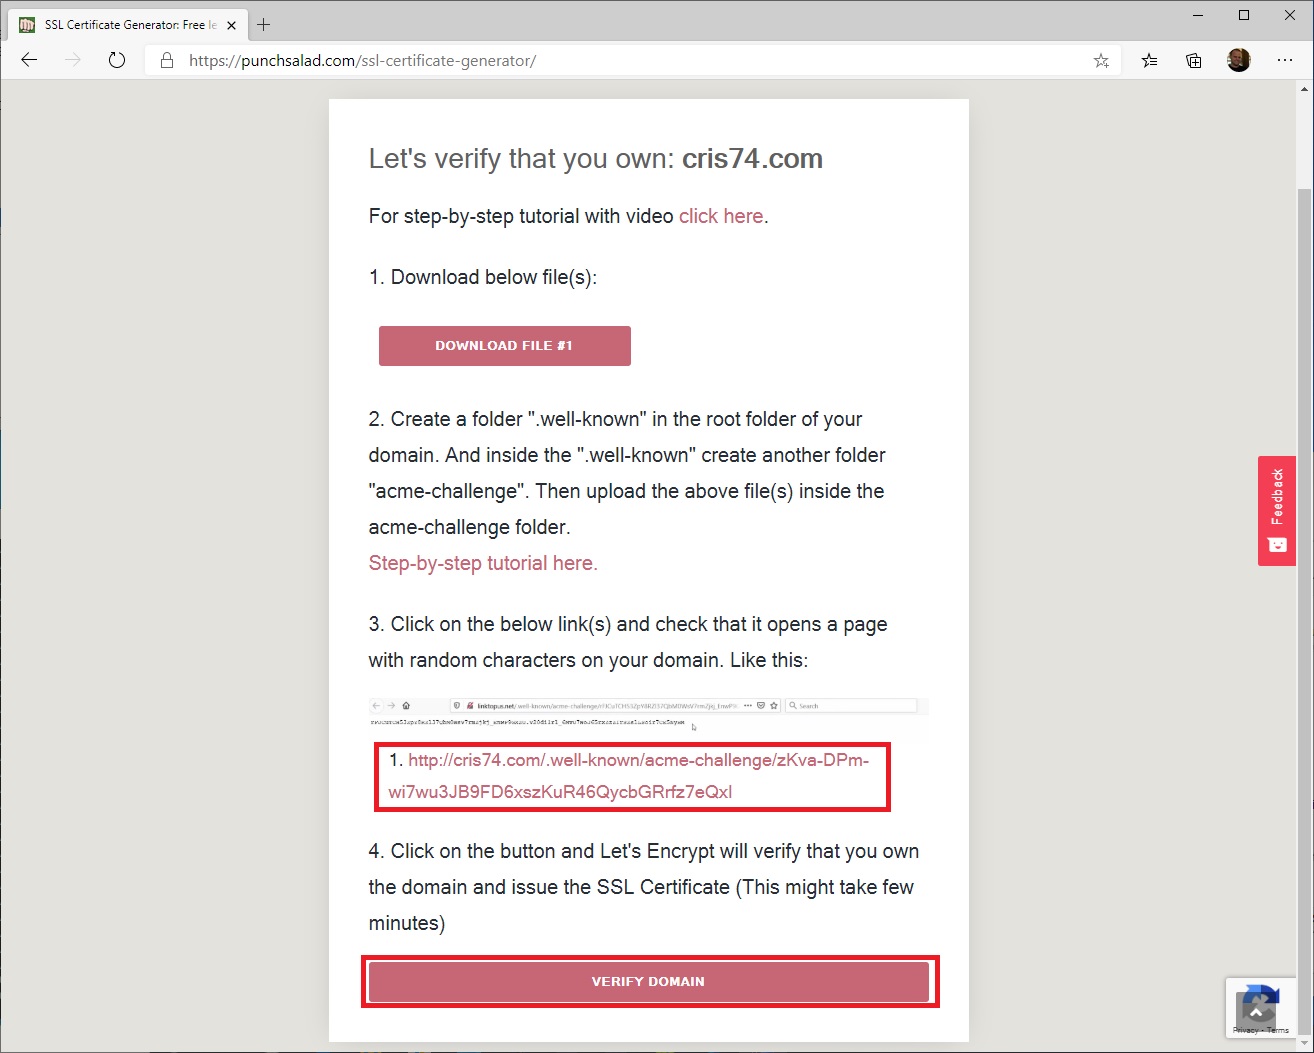
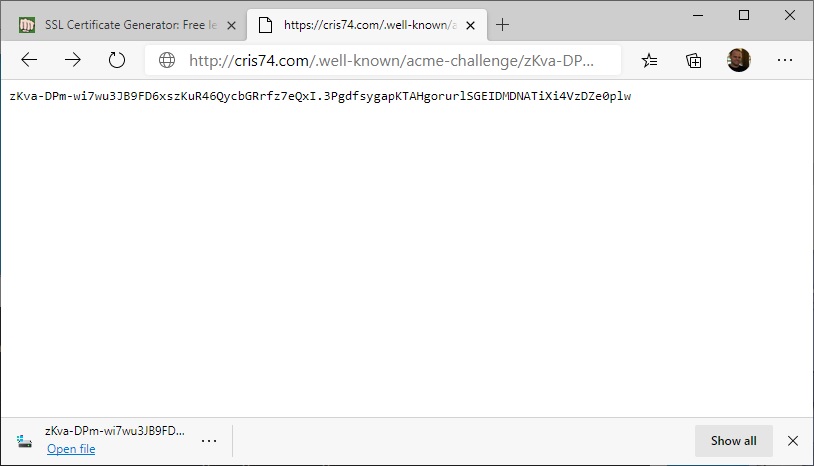
When you are ready click "VERIFY DOMAIN".
Step 3) Download the certificate -
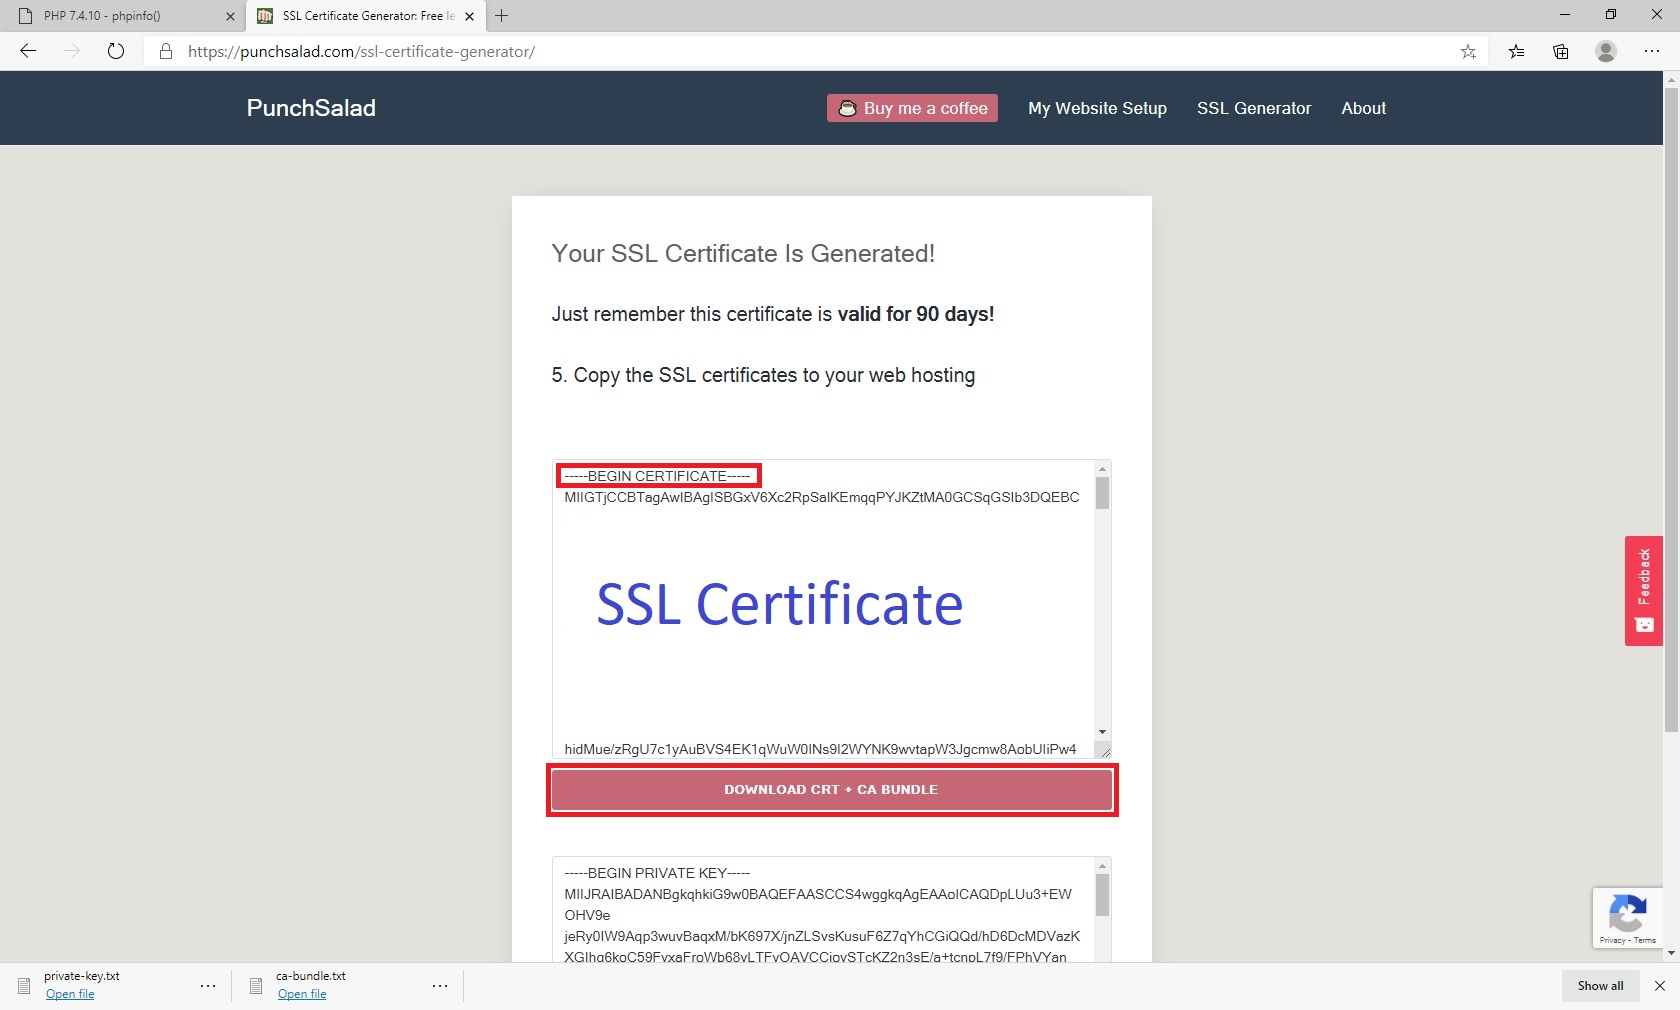
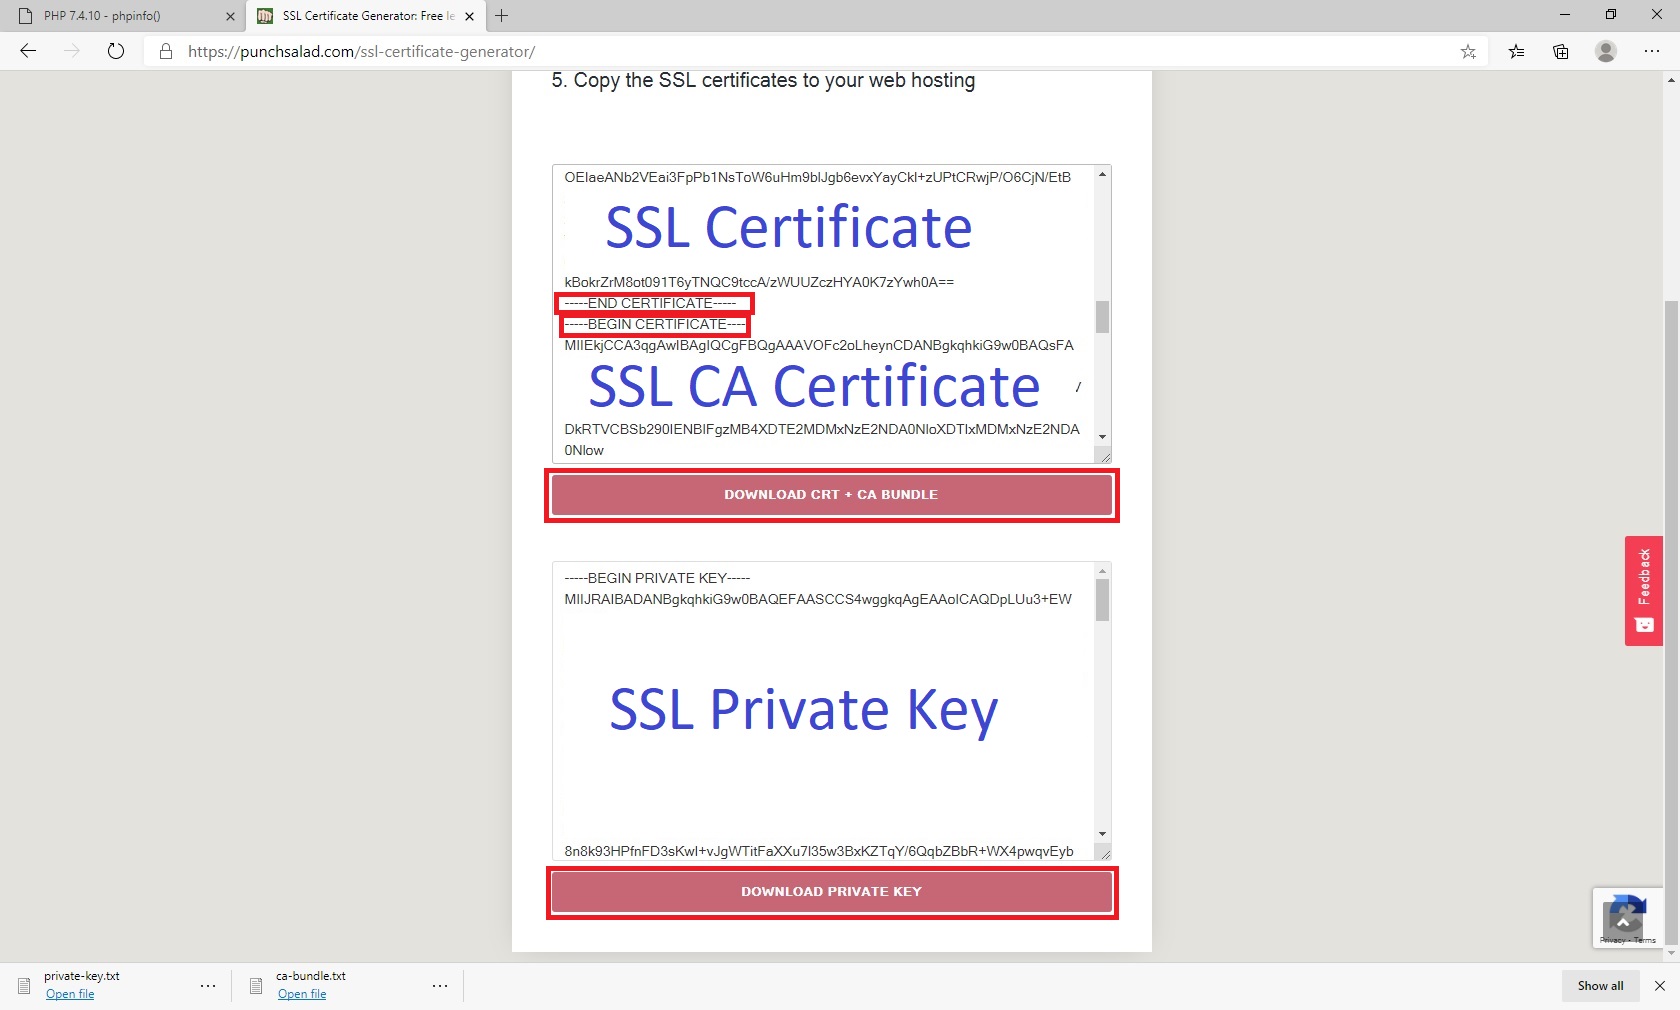
A) Once the certificate is generated the page will come with two text boxes, these are the certificates and the key. You can copy the text straight from the boxes or click the download buttons under the boxes to download them as .txt files.
B) The first of the boxes or files is called "CRT+CA Bundle", it contains the two certificates. To copy the first certificate select all the text from the very beginning of the file till and including the first "-----END CERTIFICATE-----" and paste it into a text file and save the file as "server.crt".
C) After the first certificate is done select all the text in the first box or file from and including the second "----- BEGIN CERTIFICATE-----" to the very end and paste into a text file and save the file as "server-ca.crt"
D) Once both certificates are done either download and rename the "private-key.txt" to "server.key" or copy it's entire contence into a text file and save it as "server.key"
Step 4) Install the certificate -
A) The certificates belong in the Apache configuration folder "C:\apache\conf", this location is set by the "httpd-ssl.conf" file in the "C:\apache\conf\extra" folder. The default certificate/key files are named - "server.crt", "server-ca.crt", and "server.key". Simply move the three files into "C:\Apache24\conf".
B) All that's left now it to turn on SSL. This is done by modifying the "httpd.conf" file located in the "C:\Apache\conf" folder. WARNING!!! Always backup any ".conf" file before modifying.
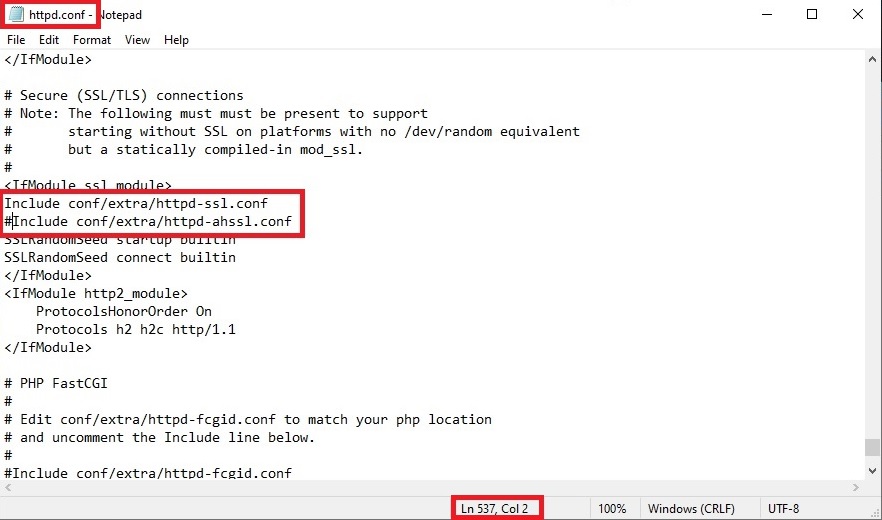
C) Open the "httpd.conf" in the Apache configuration directory, eg -"C:\Apache24\conf\" with notepad or similar and look for line "#Include conf/extra/httpd-ssl.conf" around line 530 and remove the crosshatch from the beginning.
D) While in the "httpd.conf" file place a crosshatch at the start of the following line "Include conf/extra/httpd-ahssl.conf" to disable the line and save the httpd.conf file.
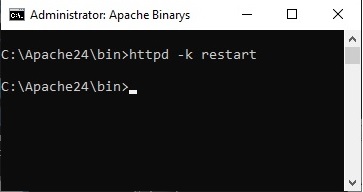
E) Restart the Apache Server using the command prompt running as administrator, go to the "C:\Apach24\bin" folder and type "httpd -k restart"
